
Step-by-Step Restoration Guide
- Thorough Cleaning of Solar Panels
- Materials Needed: Soft cloth, mild dish soap, warm water, soft-bristle brush.
- Procedure:
- Dismantle the solar light carefully to access the solar panel.
- Mix a solution of mild dish soap and warm water.
- Gently wipe the solar panel with the soft cloth dipped in the soapy solution to remove surface dirt.
- For stubborn grime, use a soft-bristle brush to lightly scrub the panel.
- Rinse with clean water and dry thoroughly with a soft cloth.
- Note: Regular cleaning every few months can prevent buildup and maintain efficiency.
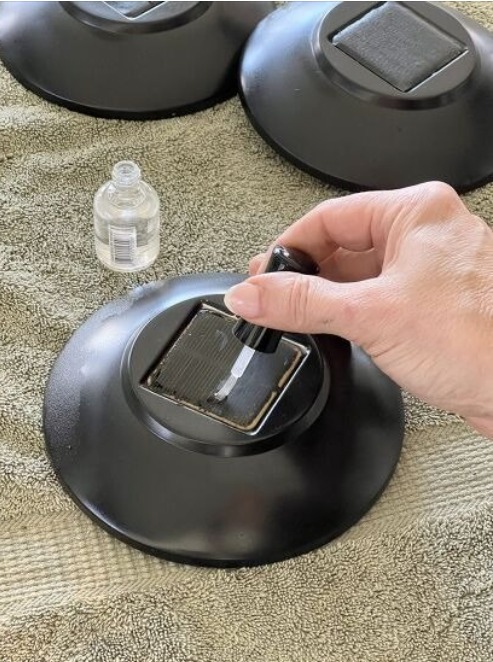
- Addressing Oxidation on Solar Panels
- Materials Needed: Non-abrasive toothpaste or a paste made from baking soda and water, soft cloth.
- Procedure:
- Apply a small amount of toothpaste or baking soda paste to the oxidized areas of the solar panel.
- Using a soft cloth, gently rub the substance in circular motions over the cloudy sections.
- Continue this process for a few minutes to allow the mild abrasive to clear the oxidation.
- Wipe off any residue with a damp cloth and dry the panel completely.
- Alternative Method: Applying a thin layer of clear nail polish can also restore clarity and provide a protective coating.
- Inspecting and Replacing Batteries
- Procedure:
- Locate and open the battery compartment, typically found beneath the solar light.
- Remove the existing batteries and check for any signs of corrosion or leakage.
- If available, test the batteries using a multimeter to determine their charge capacity.
- Replace old or faulty batteries with new rechargeable ones, ensuring they match the specifications recommended by the manufacturer.
- Tip: Opt for high-quality NiMH or Li-ion batteries for better performance and longevity.
- Procedure:
- Ensuring Proper Sealing and Water Resistance
- Procedure:
- Examine all seals and gaskets for signs of wear or damage.
- Replace any compromised seals to prevent water ingress.
- Apply a silicone-based sealant around joints and openings to enhance water resistance.
- Note: Regularly inspecting seals, especially after harsh weather conditions, can prevent moisture-related issues.
- Procedure:
- Optimal Placement for Maximum Sunlight Exposure
- Guidelines:
- Position solar lights in areas that receive direct sunlight for at least 6-8 hours daily.
- Avoid placing lights near tall plants, trees, or structures that can cast shadows over the solar panels.
- Periodically adjust the placement to account for seasonal changes in the sun’s trajectory.
- Tip: Using a solar path light with adjustable panels can help in capturing maximum sunlight.
- Guidelines:
Preventive Maintenance Tips
- Regular Cleaning: Establish a routine to clean solar panels every few months to prevent dirt accumulation.
- Seasonal Inspection: Before winter or rainy seasons, inspect and reinforce seals to protect against moisture.
- Battery Care: Every 1-2 years, check battery health and replace if necessary to maintain optimal performance.
- Storage During Extreme Weather: If feasible, store solar lights indoors during extreme weather conditions to prolong their lifespan.
By following these expert restoration and maintenance steps, you can significantly enhance the performance and longevity of your outdoor solar lights, ensuring your outdoor spaces remain well-lit and inviting throughout the year.
