Cooking Instructions
Step 1: Preheat Your Oven
Preheat the oven to 350°F (175°C). Line an 8×8-inch baking pan with parchment paper or lightly grease it for easy removal later.
Step 2: Make the Cookie Dough
In a large mixing bowl, cream together the softened butter, granulated sugar, and brown sugar until light and fluffy. This should take about 3-4 minutes with a hand mixer.
Add the creamy peanut butter and continue mixing until smooth and well incorporated.
Next, beat in the eggs, one at a time, ensuring each egg is fully mixed before adding the next. Stir in the vanilla extract.
Step 3: Combine the Dry Ingredients
In a separate bowl, whisk together the all-purpose flour, baking powder, and salt.
Gradually add the dry ingredients to the wet ingredients. Mix gently until the dough just comes together, being careful not to overmix.
Step 4: Press the Dough into the Pan
Transfer the cookie dough to the prepared baking pan. Use a spatula or your hands to spread the dough evenly into the pan, creating a smooth, even layer.
Step 5: Bake the Bars
Bake the dough for 20-25 minutes, or until the edges are golden brown and the center is set.
A toothpick inserted into the center should come out clean or with a few moist crumbs. Let the bars cool completely in the pan before glazing.
Step 6: Make the Glaze
In a small bowl, whisk together the powdered sugar, milk (or cream), and vanilla extract until smooth. Adjust the amount of milk based on how thick or runny you want the glaze to be.
Step 7: Glaze the Bars
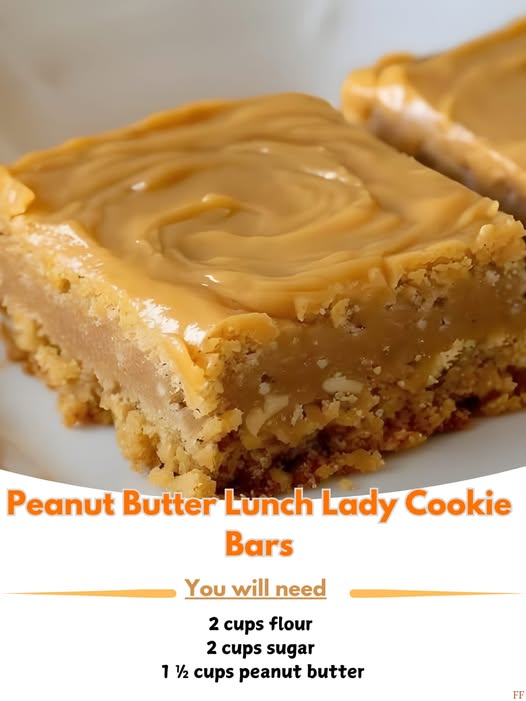
Once the bars have cooled, drizzle the glaze evenly over the top. If you’re feeling fancy, add optional toppings like sprinkles, chopped peanuts, or mini chocolate chips for a fun finishing touch.
Why You’ll Love This Recipe
Peanut Butter Flavor: These bars are packed with creamy peanut butter, delivering that signature nutty goodness in every bite.
Perfect Texture: They are soft and chewy, with just the right amount of sweetness, making them easy to bite into.
Quick and Easy: Unlike regular peanut butter cookies, this recipe is a breeze to make, with minimal steps and effort involved.
Family-Friendly: These bars are perfect for sharing with family, friends, or as a treat at gatherings.
Mistakes to Avoid & Solutions
1. The bars are too dry or crumbly
Solution: Ensure that you are not overbaking the bars. Check for doneness around 20 minutes and test with a toothpick—only bake until the edges are golden and the center is set.
2. The glaze is too runny
Solution: Add more powdered sugar until you reach your desired consistency. If it’s too thick, you can add a little more milk to loosen it up.
3. The dough is too sticky
Solution: If your dough feels too sticky, try chilling it in the fridge for about 30 minutes before pressing it into the pan.
Serving and Pairing Suggestions
– These bars are delicious on their own, but you can also pair them with a cold glass of milk or coffee.
– For a fun twist, serve them with a scoop of vanilla ice cream on the side or a dollop of whipped cream.
– They’re great for picnics, bake sales, or as a simple dessert to enjoy with friends and family.
Storage and Reheating Tips
Storage: Store leftover cookie bars in an airtight container at room temperature for up to 3-4 days.
Freezing: For longer storage, freeze the bars in an airtight container for up to 3 months. Let them thaw at room temperature before enjoying.
Reheating: If you prefer warm bars, simply microwave them for about 15-20 seconds or pop them in the oven at 300°F for 5-7 minutes.
FAQs
1. Can I use crunchy peanut butter?
Yes! Crunchy peanut butter will give these bars a nice texture, so feel free to use it in place of creamy peanut butter.
2. How can I make the bars a bit healthier?
To make them a little healthier, consider using a natural peanut butter with no added sugar or replacing some of the butter with applesauce or Greek yogurt.
3. Can I add chocolate chips to the dough?
Absolutely! You can fold in ½ cup of mini chocolate chips to the dough for an added chocolatey twist.
4. Can I make these gluten-free?
Yes! You can use a 1:1 gluten-free flour blend as a substitute for all-purpose flour.
5. How can I make the glaze thicker?
If your glaze is too thin, simply add more powdered sugar a little at a time until you reach your desired consistency.
Tips & Tricks
– If you want an extra nutty flavor, toast the chopped peanuts before sprinkling them on top of the glaze.
– For an extra indulgent treat, drizzle some melted chocolate over the glaze.
Recipe Variations
1. Chocolate Peanut Butter Bars
For a decadent twist, add ½ cup of mini chocolate chips to the dough and drizzle the bars with both peanut butter and chocolate glaze.
2. Nut-Free Option
Use sunbutter or another nut butter replacement if you need a nut-free version of these bars.
3. Swirl Variation
For a fun swirl effect, gently swirl in some melted chocolate or caramel into the dough before baking for an extra layer of flavor.
Final Thoughts
These Peanut Butter Lunch Lady Cookie Bars are an absolute crowd-pleaser—soft, chewy, and the perfect balance of sweet and savory. Baking them brings back memories of those sweet, comforting treats from childhood, but with a modern twist.
They’re simple to make, adaptable for different dietary needs, and have a texture that everyone loves. Whether you’re treating yourself or feeding a crowd, these bars will always be a hit.
I’m already thinking about the next time I’ll whip up a batch to share with my friends, and I’m sure you will, too. Just don’t forget to leave some for yourself!

